Floor Self Leveling A Complete Guide for Smooth, Even Surfaces
A perfectly level floor is not just about aesthetics — it is essential for structural integrity, comfort, and the proper installation of flooring materials. Uneven floors can lead to problems such as cracked tiles, gaps in wooden flooring, and unstable furniture. One of the most effective solutions to this problem is floor self-leveling. This process uses a special compound that spreads evenly across the surface, filling in low spots and creating a smooth, flat finish with minimal effort.
What Is Floor Self Leveling?
Floor self-leveling is a technique that involves pouring a self-leveling compound — a cement-based or polymer-modified mixture — onto an uneven floor surface. Unlike traditional concrete, these compounds have a much thinner consistency, allowing them to flow freely and settle into a flat, level layer without extensive manual spreading.
Self-leveling compounds are often used before installing materials such as tile, vinyl, laminate, or hardwood, ensuring a stable base and prolonging the life of the flooring.
Benefits of Self Leveling Floors
Smooth Finish — Creates a flawless, level surface for any type of flooring.
Time Efficient — The compound spreads quickly, reducing labor time.
Versatile — Works on concrete, tiles, plywood, and other substrates.
Durable — Provides a strong, long-lasting base that resists cracking.
Cost-Effective — Reduces the risk of costly repairs from uneven flooring.
Tools and Materials Needed
To complete a floor self-leveling project, you’ll typically need:
Self-leveling compound
Mixing bucket and paddle mixer
Measuring tools
Trowel or smoother
Primer (for better adhesion)
Protective gloves and goggles
Step-by-Step Process
Preparation — Clean the floor thoroughly, removing dust, dirt, and debris. Fill any large cracks or holes.
Priming — Apply a primer to improve adhesion and prevent air bubbles.
Mixing — Combine the self-leveling compound with water according to the manufacturer’s instructions. Mix until lump-free.
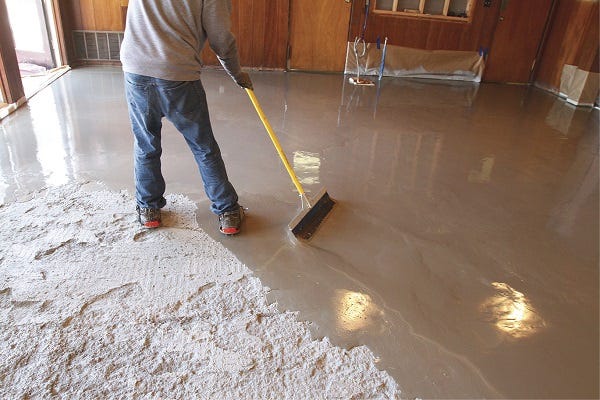
Pouring — Pour the compound starting from one corner, allowing it to flow naturally.
Spreading — Use a trowel or spreader to help the compound reach all areas.
Drying — Allow the floor to cure for the recommended time before walking or installing flooring.
Tips for Best Results
Work quickly, as the compound begins setting within minutes.
Maintain a consistent mixing ratio for even results.
Avoid drafts or direct sunlight during curing to prevent cracks.
Always follow the manufacturer’s guidelines for thickness and drying times.
Common Mistakes to Avoid
Skipping the primer, which can lead to peeling or poor adhesion.
Pouring too thick a layer, causing uneven curing.
Not addressing moisture issues beforehand.
Conclusion
Floor self leveling Doha is a reliable, efficient, and relatively simple method to achieve a perfectly flat surface for any flooring type. Whether you’re renovating a home or preparing a new space, this technique ensures durability, enhances appearance, and creates a strong foundation for your floor covering. By following proper preparation, mixing, and application steps, you can enjoy professional-quality results without the hassle of traditional leveling methods.


Comments
Post a Comment